八、视频监控、背景建模和形态学操作
在本章中,我们将学习如何在静态摄像机拍摄的视频中检测运动对象。 这在视频监控系统中被广泛使用。 我们将讨论可用于构建此系统的不同特征。 我们将学习背景建模,并了解如何使用它来构建实时视频中的背景模型。 一旦我们这样做了,我们将组合所有的块来检测视频中感兴趣的对象。
在本章结束时,您应该能够回答以下问题:
- 什么是天真的背景减法?
- 什么是帧差?
- 我们如何构建背景模型?
- 我们如何识别静态视频中的新对象?
- 什么是形态学图像处理?它与背景建模有什么关系?
- 如何使用形态运算符实现不同的效果?
技术要求
本章要求熟悉 C++ 编程语言的基础知识。 本章使用的所有代码都可以从以下 giHub 链接下载:https://github.com/PacktPublishing/Building-Computer-Vision-Projects-with-OpenCV4-and-CPlusPlus/tree/master/Chapter08。 该代码可以在任何操作系统上执行,尽管它只在 Ubuntu 上进行了测试。
请查看以下视频,了解实际操作中的代码:
理解背景减法
背景减除在视频监控中非常有用。 基本上,背景减去技术在我们必须检测静态场景中的移动对象的情况下执行得非常好。 这对视频监控有什么用处? 视频监控的过程涉及到处理持续不断的数据流。 数据流不断涌入,我们需要对其进行分析以识别任何可疑活动。 让我们考虑一下酒店大堂的例子。 所有的墙壁和家具都有固定的位置。 如果我们建立一个背景模型,我们就可以用它来识别大厅里的可疑活动。 我们利用了背景场景保持静态的事实(在本例中恰好是这样)。 这有助于我们避免任何不必要的计算开销。 顾名思义,该算法的工作原理是检测图像的每个像素并将其分配给两类,背景(假定是静态的和稳定的)或前景,并从当前帧中减去它以获得前景图像部分,其中包括运动对象,如人物、汽车等。 在静态假设下,前景对象将自然地对应于在背景前面移动的对象或人。
为了检测运动目标,我们需要建立背景模型。 这与直接帧差不同,因为我们实际上是在对背景建模,并使用此模型来检测移动对象。 当我们说我们正在对背景建模时,我们基本上是在构建一个可以用来表示背景的数学公式。 这比简单的帧差分技术要好得多。 该技术尝试检测场景的静态部分,然后在背景模型的构建统计公式中包括小的更新。 然后使用该背景模型来检测背景像素。 因此,这是一种可以根据场景进行调整的自适应技术。
朴素背景减法
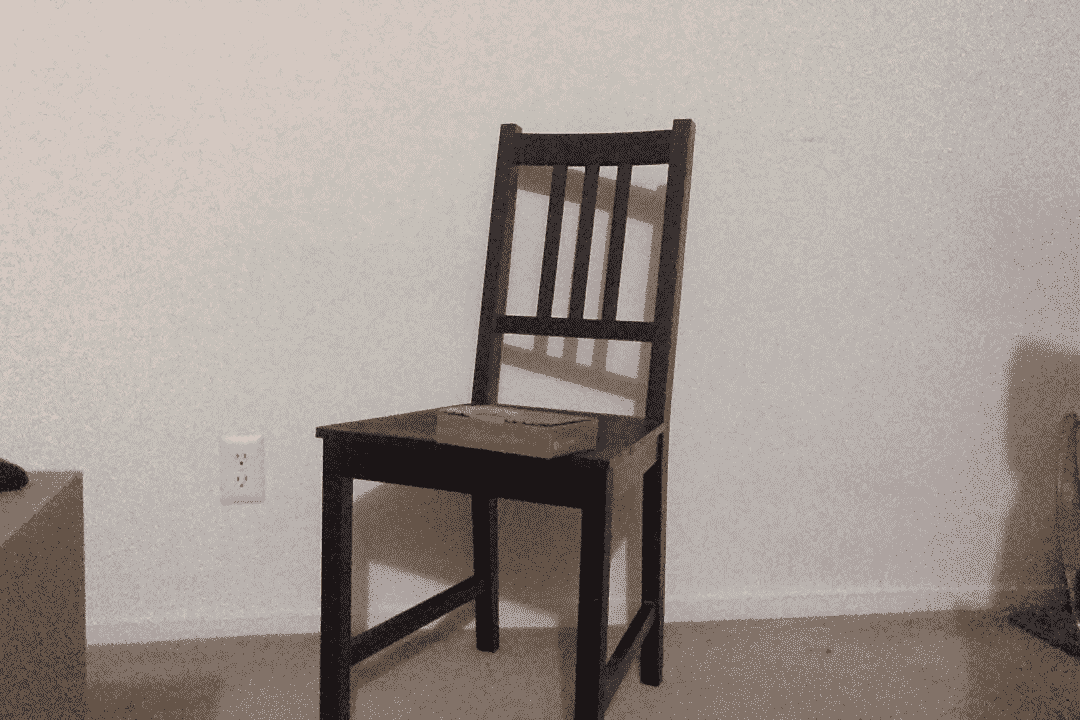
让我们从头开始讨论吧。 背景减去过程是什么样子的? 请考虑下图:
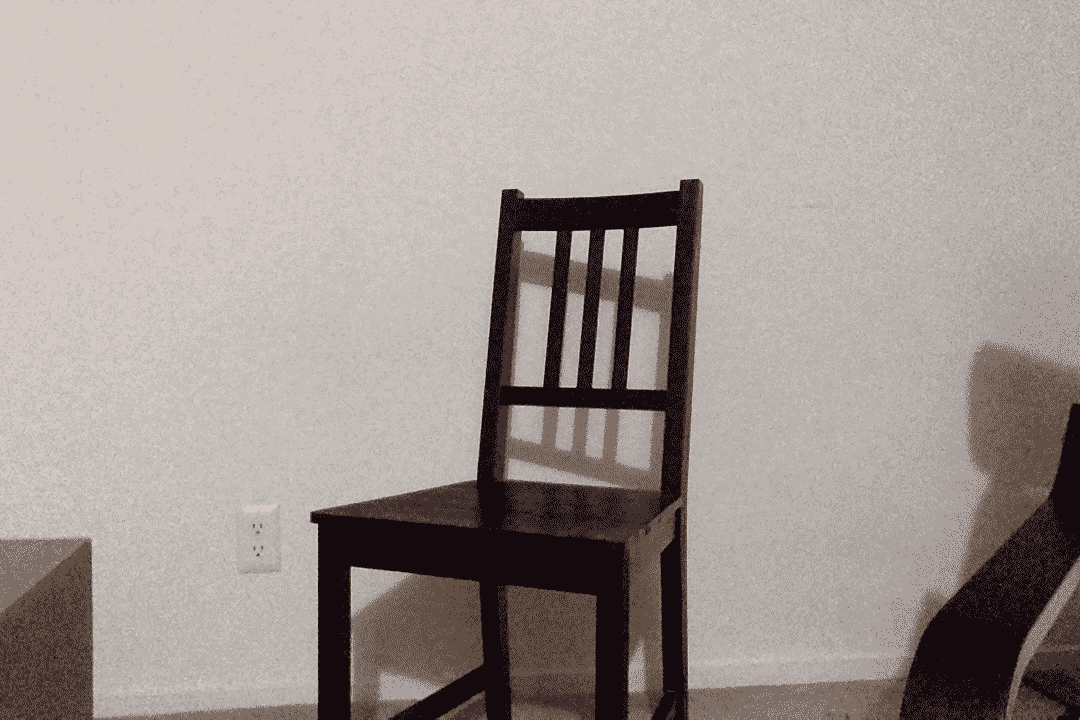
上图表示背景场景。 现在,让我们在此场景中引入一个新对象:
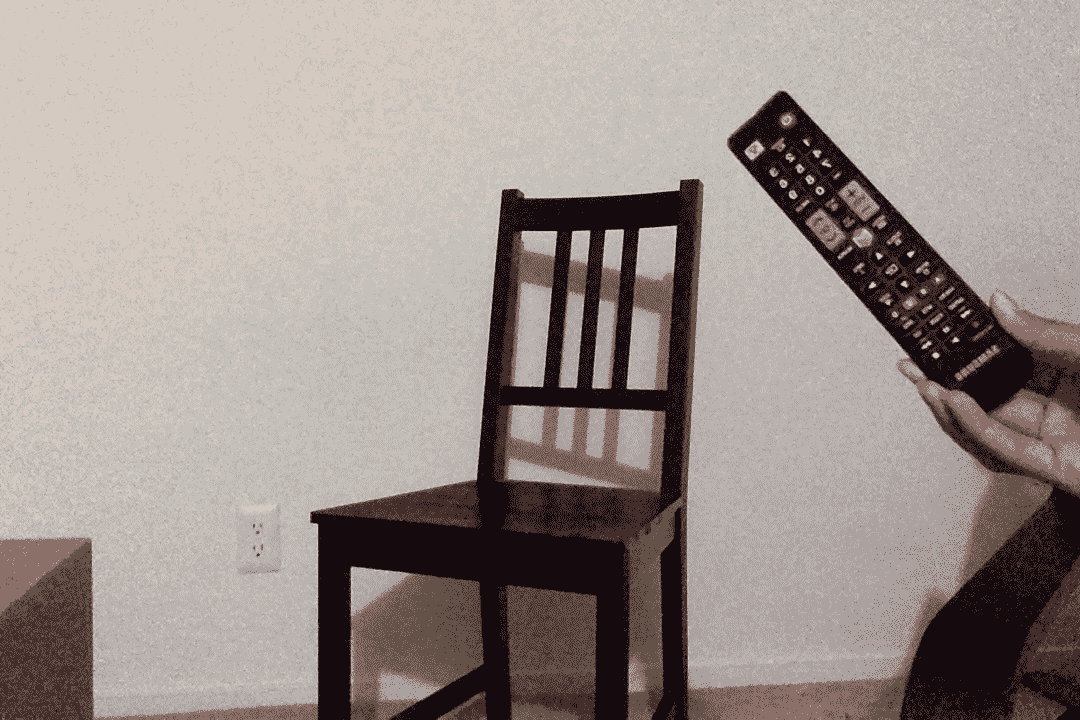
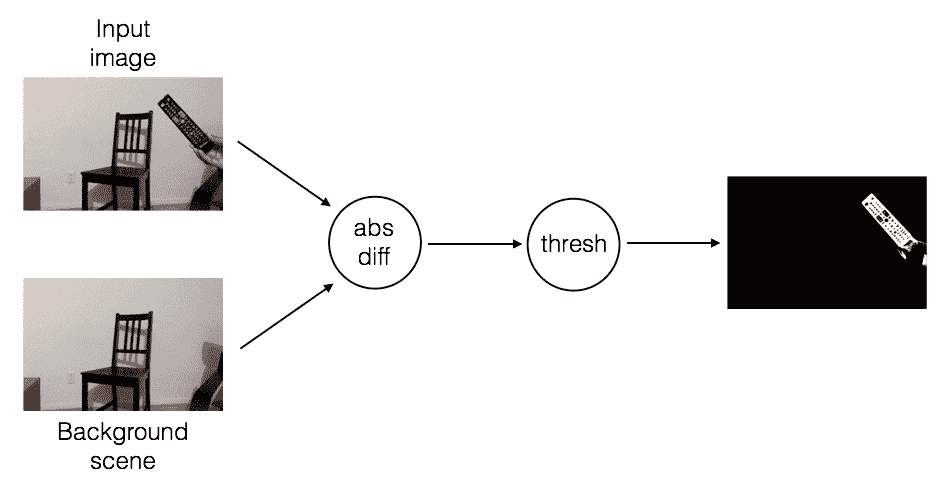
正如我们所看到的,场景中有一个新对象。 因此,如果我们计算这张图像和我们的背景模型之间的差异,您应该能够识别电视遥控器的位置:

整个流程如下所示:
它工作得好吗?
我们称它为幼稚方法是有原因的! 它在理想的条件下工作,正如我们所知,在现实世界中没有什么是理想的。 它在计算给定对象的形状方面做得相当不错,但它是在一些约束条件下这样做的。 这种方法的主要要求之一是目标的颜色和强度应该与背景的颜色和强度有足够的不同。 影响这种算法的一些因素包括图像噪声、照明条件和相机的自动对焦。
一旦一个新物体进入我们的场景并停留在那里,就很难检测到它前面的新物体。 这是因为我们没有更新背景模型,而新对象现在是背景的一部分。 请考虑下图:
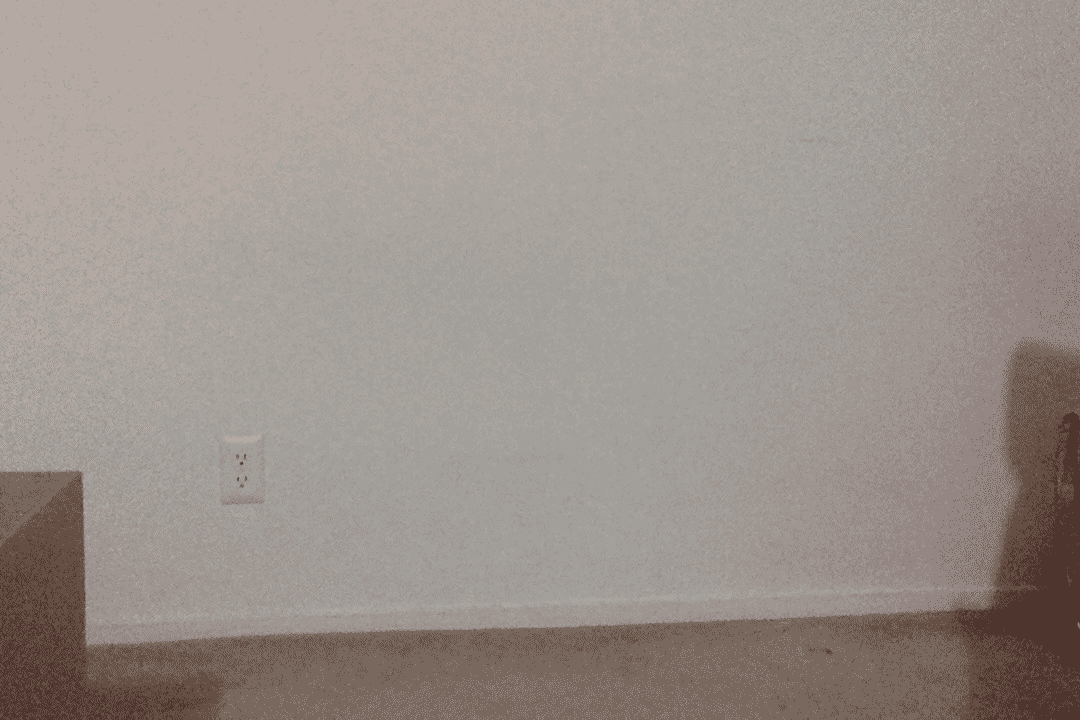
现在,假设一个新对象进入我们的场景:

我们检测到这是一个新物体,这很好! 假设另一个对象进入场景:
很难识别这两个不同对象的位置,因为它们的位置是重叠的。 以下是减去背景并应用阈值后得到的结果:

在这种方法中,我们假设背景是静态的。 如果背景的某些部分开始移动,这些部分将开始被检测为新对象。 因此,即使是微小的移动,比如飘动的旗帜,也会导致我们的检测算法出现问题。 这种方法对照明的变化也很敏感,并且不能处理任何摄像机移动。 不用说,这是一种微妙的方法! 我们需要一种能够处理现实世界中所有这些事情的东西。
帧差分
我们知道,我们不能保持可用于检测对象的静态背景图像模式。 解决此问题的方法之一是使用帧差。 这是我们可以用来查看视频的哪些部分正在移动的最简单的技术之一。 当我们考虑实时视频流时,连续帧之间的差异提供了大量信息。 这个概念相当简单! 我们只获取连续帧之间的差异,并显示它们之间的差异。
如果我快速移动我的笔记本电脑,我们可以看到类似这样的情况:

让我们移动物体,看看会发生什么,而不是笔记本电脑。 如果我迅速摇头,它会是这样的:
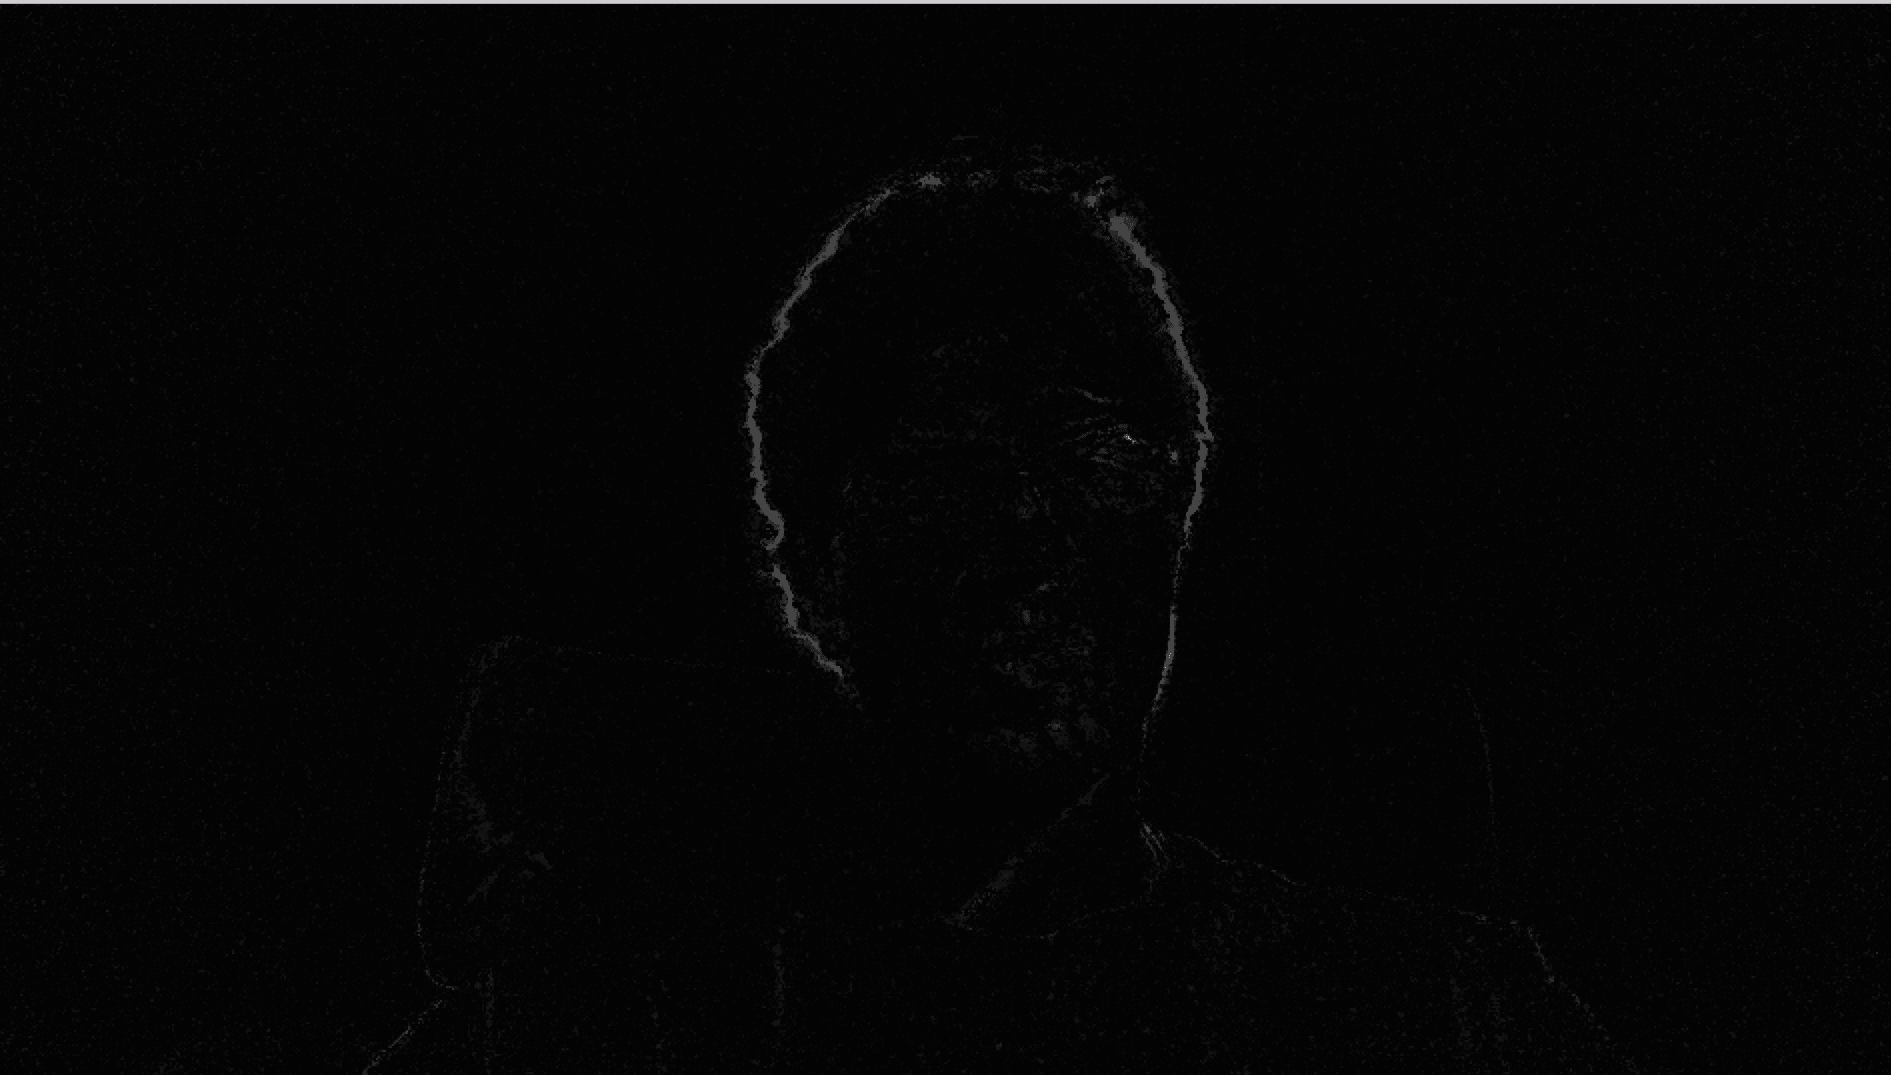
正如您从前面的图像中看到的,只有视频的移动部分会高亮显示。 这为我们提供了一个很好的起点来查看视频中哪些区域在移动。 让我们看一下计算帧差的函数:
Mat frameDiff(Mat prevFrame, Mat curFrame, Mat nextFrame)
{
    Mat diffFrames1, diffFrames2, output;

    // Compute absolute difference between current frame and the next
    absdiff(nextFrame, curFrame, diffFrames1);

    // Compute absolute difference between current frame and the previous
    absdiff(curFrame, prevFrame, diffFrames2);

    // Bitwise "AND" operation between the previous two diff images
    bitwise_and(diffFrames1, diffFrames2, output);

    return output;
}
帧差异相当简单! 您可以计算当前帧和上一帧之间以及当前帧和下一帧之间的绝对差异。 然后,我们获取这些帧差异,并应用按位和运算符。 这将突出显示图像中的移动部分。 如果只计算当前帧和前一帧之间的差异,则往往会产生噪波。 因此,我们需要在连续的帧差之间使用按位 AND 运算符,以便在看到移动对象时获得一定的稳定性。
让我们看一下可以从网络摄像头中提取并返回帧的函数:
Mat getFrame(VideoCapture cap, float scalingFactor)
{
    Mat frame, output;

    // Capture the current frame
    cap >> frame;

    // Resize the frame
    resize(frame, frame, Size(), scalingFactor, scalingFactor, INTER_AREA);

    // Convert to grayscale
    cvtColor(frame, output, COLOR_BGR2GRAY);

    return output;
}
正如我们所看到的,这是相当直截了当的。 我们只需要调整帧的大小并将其转换为灰度。 现在我们已经准备好了助手函数,让我们来看一下 Main 函数,看看它们是如何组合在一起的:
int main(int argc, char* argv[])
{
    Mat frame, prevFrame, curFrame, nextFrame;
    char ch;

    // Create the capture object
    // 0 -> input arg that specifies it should take the input from the webcam
    VideoCapture cap(0);

    // If you cannot open the webcam, stop the execution!
    if(!cap.isOpened())
        return -1;

    //create GUI windows
    namedWindow("Frame");

    // Scaling factor to resize the input frames from the webcam
    float scalingFactor = 0.75;

    prevFrame = getFrame(cap, scalingFactor);
    curFrame = getFrame(cap, scalingFactor);
    nextFrame = getFrame(cap, scalingFactor);

    // Iterate until the user presses the Esc key
    while(true)
    {
        // Show the object movement
        imshow("Object Movement", frameDiff(prevFrame, curFrame, nextFrame));

        // Update the variables and grab the next frame
        prevFrame = curFrame;
        curFrame = nextFrame;
        nextFrame = getFrame(cap, scalingFactor);

        // Get the keyboard input and check if it's 'Esc'
        // 27 -> ASCII value of 'Esc' key
        ch = waitKey( 30 );
        if (ch == 27) {
            break;
        }
    }
    // Release the video capture object
    cap.release();

    // Close all windows
    destroyAllWindows();

    return 1;
}
它的效果如何?
正如我们所看到的,帧差异解决了我们早先面临的几个重要问题。 它可以快速适应光线变化或相机移动。 如果对象进入帧并停留在那里,则在以后的帧中将不会检测到该对象。 这种方法的主要关注点之一是检测颜色均匀的物体。 它只能检测颜色均匀的物体的边缘。 原因是该对象的很大一部分将导致非常低的像素差异:
假设这个物体稍微移动了一下。 如果我们将此帧与上一帧进行比较,它将如下所示:

因此,我们在该对象上标记的像素非常少。 另一个令人担忧的问题是,很难检测到物体是朝向相机还是远离相机。
混合高斯方法
在我们讨论高斯的混合(MOG)之前,让我们先看看什么是混合模型。 混合模型只是一种统计模型,可以用来表示我们数据中的子总体的存在。 我们并不真正关心每个数据点属于什么类别。 我们所需要做的就是确定数据中包含多个组。 如果我们用高斯函数来表示每个子总体,那么它就叫做高斯混合。 让我们来看一下下面的照片:

现在,随着我们在这个场景中收集更多的帧,图像的每个部分都将逐渐成为背景模型的一部分。 这也是我们在帧差部分前面讨论的内容。 如果场景是静态的,模型会自动调整以确保更新背景模型。 应该表示前景对象的前景蒙版在这一点上看起来像黑色图像,因为每个像素都是背景模型的一部分。
OpenCV has multiple algorithms implemented for the Mixture of Gaussians approach. One of them is called MOG and the other is called MOG2: refer to this link for a detailed explanation: http://docs.opencv.org/master/db/d5c/tutorial_py_bg_subtraction.html#gsc.tab=0. You will also be able check out the original research papers that were used to implement these algorithms.
让我们等待一段时间,然后在场景中引入一个新对象。 让我们使用 MOG2 方法来看看新的前景遮罩是什么样子:

如您所见,新对象正在被正确识别。 让我们看一下代码中有趣的部分(您可以在.cpp文件中获得完整的代码):
int main(int argc, char* argv[])
{

    // Variable declaration and initialization
    ....
    // Iterate until the user presses the Esc key
    while(true)
    {
        // Capture the current frame
        cap >> frame;

        // Resize the frame
        resize(frame, frame, Size(), scalingFactor, scalingFactor, INTER_AREA);

        // Update the MOG2 background model based on the current frame
        pMOG2->apply(frame, fgMaskMOG2);

        // Show the MOG2 foreground mask
        imshow("FG Mask MOG 2", fgMaskMOG2);

        // Get the keyboard input and check if it's 'Esc'
        // 27 -> ASCII value of 'Esc' key
        ch = waitKey( 30 );
        if (ch == 27) {
            break;
        }
    }

    // Release the video capture object
    cap.release();

    // Close all windows
    destroyAllWindows();

    return 1;
}
代码里发生了什么?
让我们快速浏览一下代码,看看那里发生了什么。 我们使用混合高斯模型来创建背景减去对象。 此对象表示当我们遇到来自网络摄像头的新帧时将更新的模型。 我们初始化了两个背景减去模型-BackgroundSubtractorMOG和BackgroundSubtractorMOG2。 它们代表了用于背景减去的两种不同算法。 第一个是指P的论文。 KadewTraKuPong和R。 Bowden,,标题为一种改进的自适应背景混合模型,用于阴影检测的实时跟踪。 你可以在http://personal.ee.surrey.ac.uk/Personal/R.Bowden/publications/avbs01/avbs01.pdf上查看。 第二篇引用了Z的论文。 Zivkovic,,题为改进的自适应高斯混合模型背景减除.。 您可以在这里查看:http://www.zoranz.net/Publications/zivkovic2004ICPR.pdf。
我们开始一个无限的while循环,并连续读取网络摄像头的输入帧。 对于每个帧,我们都会更新背景模型,如以下各行所示:
pMOG2->apply(frame, fgMaskMOG2);
在这些步骤中更新背景模型。 现在,如果新对象进入场景并停留在那里,它将成为背景模型的一部分。 这帮助我们克服了朴素背景减去模型的最大缺点之一。
形态学图像处理
正如我们前面讨论的,背景减除方法受许多因素的影响。 它们的准确性取决于我们如何捕捉数据以及如何处理这些数据。 影响这些算法的最大因素之一是噪声水平。 当我们说噪声时,我们谈论的是诸如图像中的颗粒性和孤立的黑/白像素之类的东西。 这些问题往往会影响我们算法的质量。 这就是形态学图像处理发挥作用的地方。 形态学图像处理在许多实时系统中得到了广泛的应用,以保证输出的质量。 形态学图像处理是指对图像中特征的形状进行处理;例如,可以使形状变粗或变薄。 形态运算符不取决于像素在图像中的排序方式,而取决于它们的值。 这就是为什么它们非常适合处理二值图像中的形状。 形态学图像处理也可以应用于灰度图像,但像素值不会有太大影响。
潜在的原则是什么?
形态运算符使用结构元素修改图像。 什么是结构元素? 结构元素基本上是一个小形状,可以用来检查图像中的一个小区域。 它被定位在图像中的所有像素位置,以便可以检查该邻域。 我们基本上是取一个小窗口,并将其覆盖在一个像素上。 根据响应,我们在该像素位置采取适当的操作。
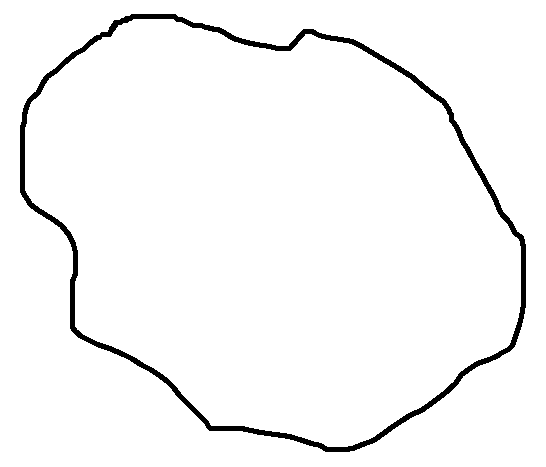
让我们考虑以下输入图像:

我们将对这张图像应用一系列形态学操作,以查看形状是如何变化的。
瘦身造型
我们使用一种称为侵蚀的操作来实现这种效果。 这是通过剥离图像中所有形状的边界层来使形状变薄的操作:

让我们看看执行形态侵蚀的函数:
Mat performErosion(Mat inputImage, int erosionElement, int erosionSize)
{

    Mat outputImage;
    int erosionType;

    if(erosionElement == 0)
        erosionType = MORPH_RECT;
    else if(erosionElement == 1)
        erosionType = MORPH_CROSS;
    else if(erosionElement == 2)
        erosionType = MORPH_ELLIPSE;

    // Create the structuring element for erosion
    Mat element = getStructuringElement(erosionType, Size(2*erosionSize + 1, 2*erosionSize + 1), Point(erosionSize, erosionSize));

    // Erode the image using the structuring element
    erode(inputImage, outputImage, element);

    // Return the output image
    return outputImage;
}
您可以查看.cpp文件中的完整代码,以了解如何使用此函数。 我们基本上使用内置的 OpenCV 函数构建结构化元素。 此对象用作探针,根据特定条件修改每个像素。 这些条件指的是图像中特定像素周围发生的情况。 例如,它是否被白色像素包围? 或者它被黑色像素包围? 一旦我们有了答案,我们就会采取适当的行动。
加厚形状
我们使用一种称为膨胀的操作来实现增厚。 这是通过将边界层添加到图像中的所有形状来使形状更厚的操作:

下面是执行此操作的代码:
Mat performDilation(Mat inputImage, int dilationElement, int dilationSize)
{
    Mat outputImage;
    int dilationType;

    if(dilationElement == 0)
        dilationType = MORPH_RECT;
    else if(dilationElement == 1)
        dilationType = MORPH_CROSS;
    else if(dilationElement == 2)
        dilationType = MORPH_ELLIPSE;

    // Create the structuring element for dilation
    Mat element = getStructuringElement(dilationType, Size(2*dilationSize + 1, 2*dilationSize + 1), Point(dilationSize, dilationSize));

    // Dilate the image using the structuring element
    dilate(inputImage, outputImage, element);

    // Return the output image
    return outputImage;
}
其他形态运算符
下面是其他一些有趣的形态运算符。 让我们先看一下输出图像。 我们可以查看本节末尾的代码。
形态开口
这是打开形状的操作。 该运算符经常用于去除图像中的噪声。 基本上就是先侵蚀后膨胀。 形态开口通过将小对象放置在背景中,将它们从图像的前景中移除:

以下是执行形态打开的函数:
Mat performOpening(Mat inputImage, int morphologyElement, int morphologySize)
{

    Mat outputImage, tempImage;
    int morphologyType;

    if(morphologyElement == 0)
        morphologyType = MORPH_RECT;
    else if(morphologyElement == 1)
        morphologyType = MORPH_CROSS;
    else if(morphologyElement == 2)
        morphologyType = MORPH_ELLIPSE;

    // Create the structuring element for erosion
    Mat element = getStructuringElement(morphologyType, Size(2*morphologySize + 1, 2*morphologySize + 1), Point(morphologySize, morphologySize));

    // Apply morphological opening to the image using the structuring element
    erode(inputImage, tempImage, element);
    dilate(tempImage, outputImage, element);

    // Return the output image
    return outputImage;
}
正如我们在这里看到的,我们对图像应用侵蚀和膨胀来执行形态学打开。
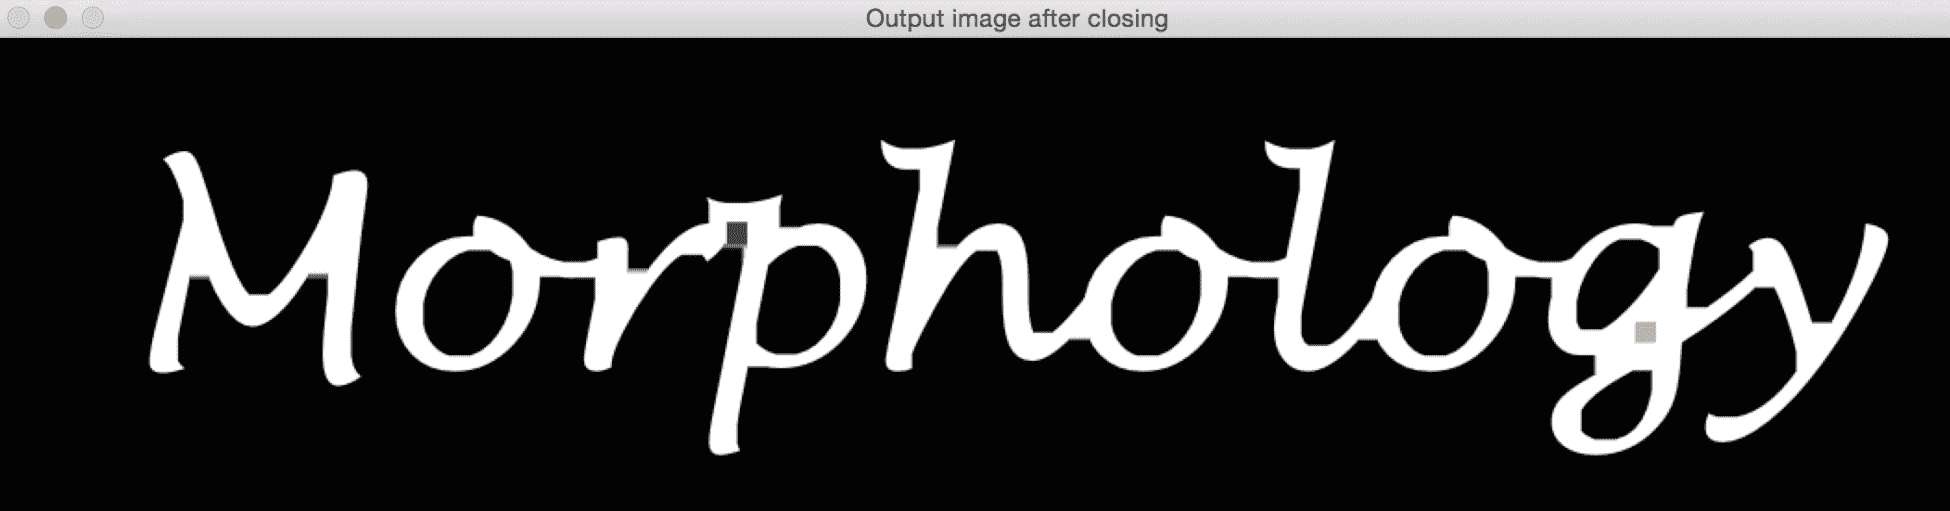
形态闭合
这是通过填充间隙来关闭形状的操作,如下面的屏幕截图所示。 此操作也可用于噪声去除。 它基本上是先膨胀后侵蚀的过程。 此操作通过将背景中的小对象更改为前景来移除前景中的小洞:
让我们快速了解一下执行形态闭合的函数:
Mat performClosing(Mat inputImage, int morphologyElement, int morphologySize)
{

    Mat outputImage, tempImage;
    int morphologyType;

    if(morphologyElement == 0)
        morphologyType = MORPH_RECT;
    else if(morphologyElement == 1)
        morphologyType = MORPH_CROSS;
    else if(morphologyElement == 2)
        morphologyType = MORPH_ELLIPSE;

    // Create the structuring element for erosion
    Mat element = getStructuringElement(morphologyType, Size(2*morphologySize + 1, 2*morphologySize + 1), Point(morphologySize, morphologySize));

    // Apply morphological opening to the image using the structuring element
    dilate(inputImage, tempImage, element);
    erode(tempImage, outputImage, element);

    // Return the output image
    return outputImage;
}
绘制边界
我们使用形态梯度来实现这一点。 这是通过计算图像的膨胀和侵蚀之间的差异来在形状周围绘制边界的操作:

让我们看一下执行形态渐变的函数:
Mat performMorphologicalGradient(Mat inputImage, int morphologyElement, int morphologySize)
{
    Mat outputImage, tempImage1, tempImage2;
    int morphologyType;

    if(morphologyElement == 0)
        morphologyType = MORPH_RECT;
    else if(morphologyElement == 1)
        morphologyType = MORPH_CROSS;
    else if(morphologyElement == 2)
        morphologyType = MORPH_ELLIPSE;

    // Create the structuring element for erosion
    Mat element = getStructuringElement(morphologyType, Size(2*morphologySize + 1, 2*morphologySize + 1), Point(morphologySize, morphologySize));

    // Apply morphological gradient to the image using the structuring element
    dilate(inputImage, tempImage1, element);
    erode(inputImage, tempImage2, element);

    // Return the output image
    return tempImage1 - tempImage2;
}
Top Hat 变换
该变换从图像中提取更精细的细节。 这就是输入图像和其形态开口之间的差异。 这为我们提供了图像中比结构元素更小、比周围环境更亮的对象。 根据结构元素的大小,我们可以提取给定图像中的各种对象:
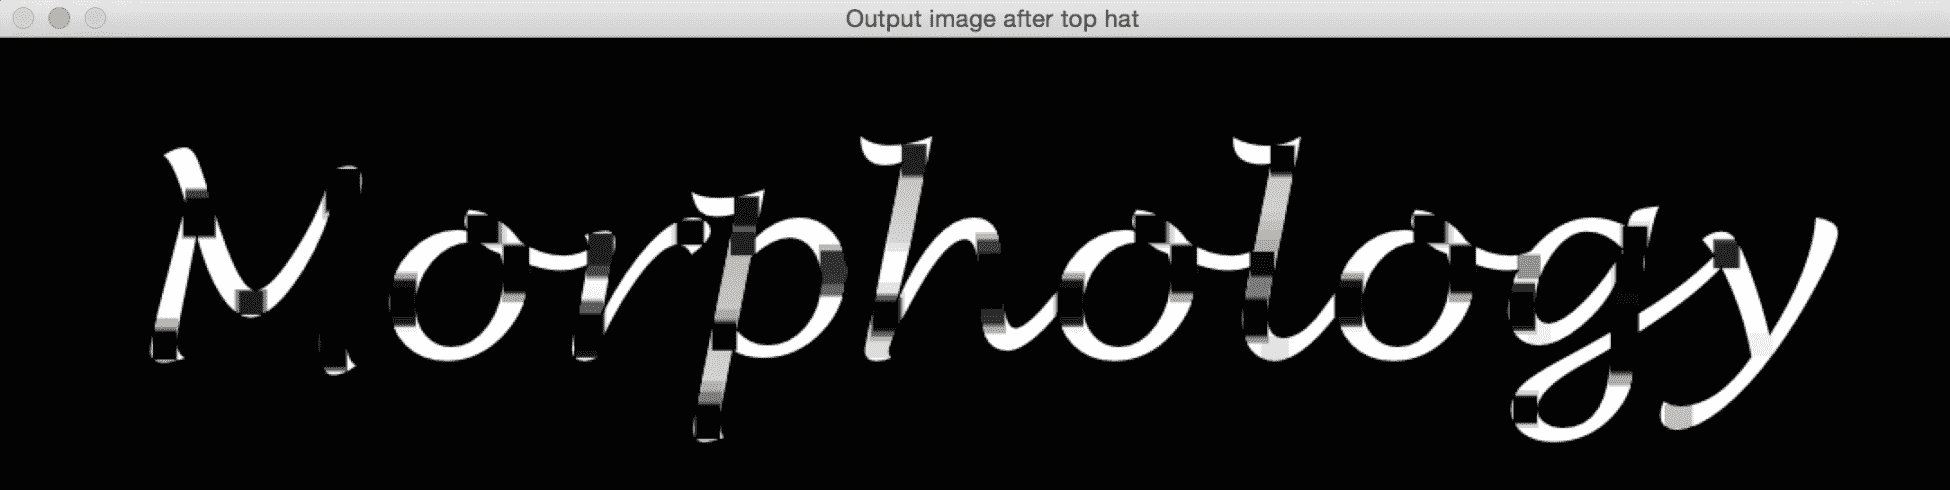
如果你仔细观察输出的图像,你可以看到那些黑色的矩形。 这意味着结构元素能够适应那里,所以这些区域变暗了。 下面是函数:
Mat performTopHat(Mat inputImage, int morphologyElement, int morphologySize)
{

    Mat outputImage;
    int morphologyType;

    if(morphologyElement == 0)
        morphologyType = MORPH_RECT;
    else if(morphologyElement == 1)
        morphologyType = MORPH_CROSS;
    else if(morphologyElement == 2)
        morphologyType = MORPH_ELLIPSE;

    // Create the structuring element for erosion
    Mat element = getStructuringElement(morphologyType, Size(2*morphologySize + 1, 2*morphologySize + 1), Point(morphologySize, morphologySize));

    // Apply top hat operation to the image using the structuring element
    outputImage = inputImage - performOpening(inputImage, morphologyElement, morphologySize);

    // Return the output image
    return outputImage;
}
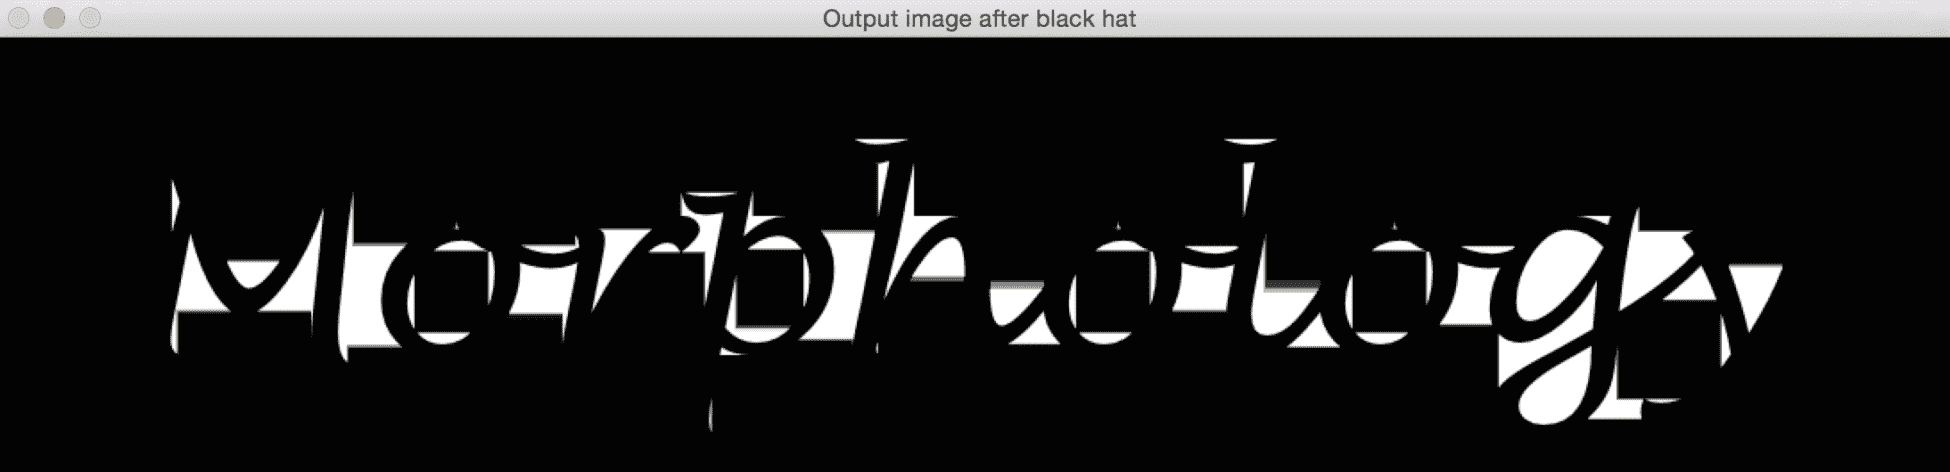
黑帽变换
该变换还可以从图像中提取更精细的细节。 这就是图像的形态闭合和图像本身之间的区别。 这为我们提供了图像中比结构元素更小、比其周围环境更暗的对象:
让我们看一下执行 Black Hat 转换的函数:
Mat performBlackHat(Mat inputImage, int morphologyElement, int morphologySize)
{
    Mat outputImage;
    int morphologyType;

    if(morphologyElement == 0)
        morphologyType = MORPH_RECT;
    else if(morphologyElement == 1)
        morphologyType = MORPH_CROSS;
    else if(morphologyElement == 2)
        morphologyType = MORPH_ELLIPSE;

    // Create the structuring element for erosion
    Mat element = getStructuringElement(morphologyType, Size(2*morphologySize + 1, 2*morphologySize + 1), Point(morphologySize, morphologySize));

    // Apply black hat operation to the image using the structuring element
    outputImage = performClosing(inputImage, morphologyElement, morphologySize) - inputImage;

    // Return the output image
    return outputImage;
}
简略的 / 概括的 / 简易判罪的 / 简易的
在本章中,我们学习了用于背景建模和形态学图像处理的算法。 我们讨论了朴素的背景减法及其局限性。 我们研究了如何使用帧差来获取运动信息,以及当我们想要跟踪不同类型的对象时,它是如何受到限制的。 这导致了我们对高斯混合的讨论。 我们讨论了这个公式以及我们如何实现它。 然后,我们讨论了可以用于各种目的的形态学图像处理,并介绍了不同的操作来展示用例。
在下一章中,我们将讨论目标跟踪以及可以用来实现目标跟踪的各种技术。
